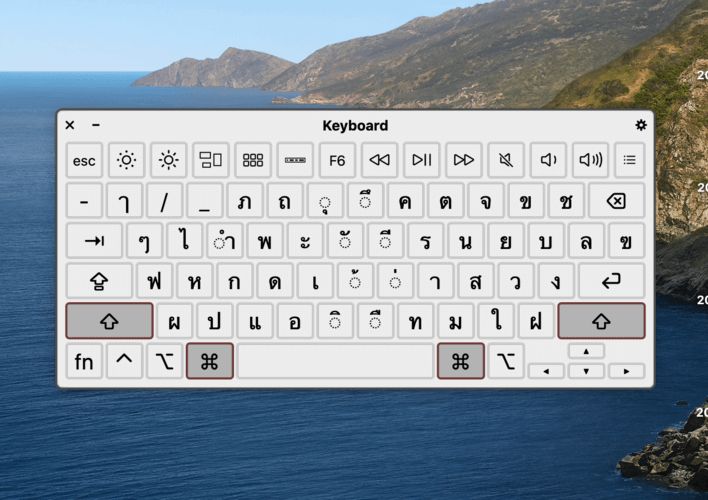
Let’s learn how to switch to a Thai keyboard on your mac so that you can practice typing.
Step 1
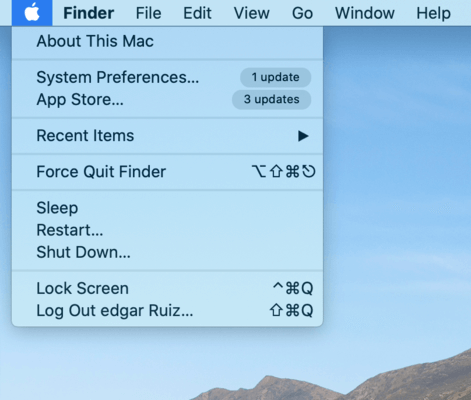
Click on the apple icon on the top left and then click on ‘System Preferences’.
Step 2
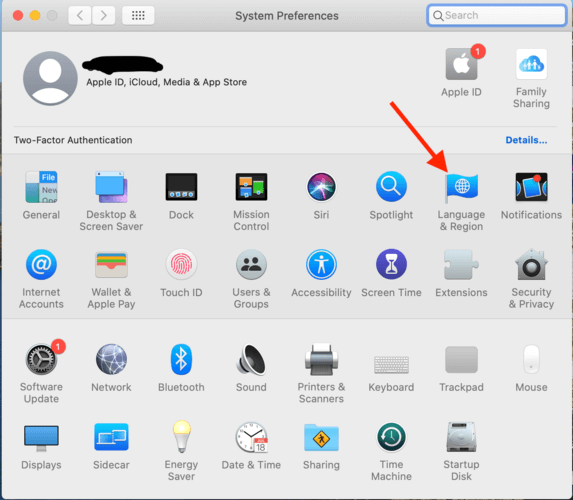
Click on ‘Language & Region’
Step 3
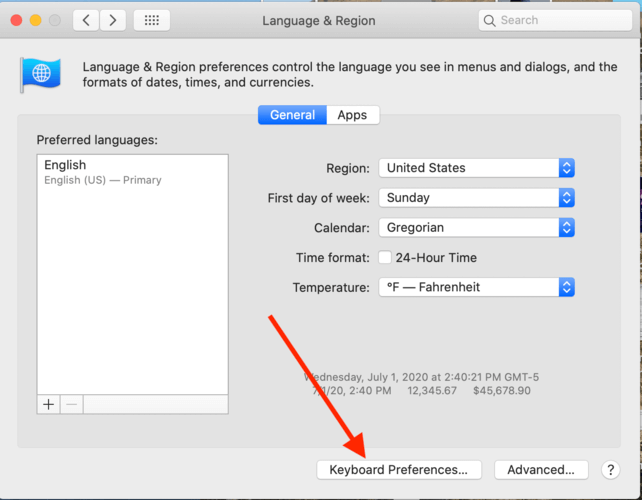
Click on ‘Keyboard preferences’
Step 4
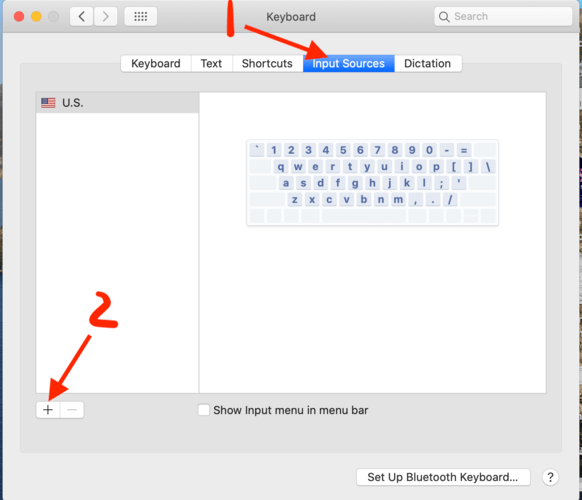
Click on the ‘Input sources’ tab and then on the plus sign.
Step 5
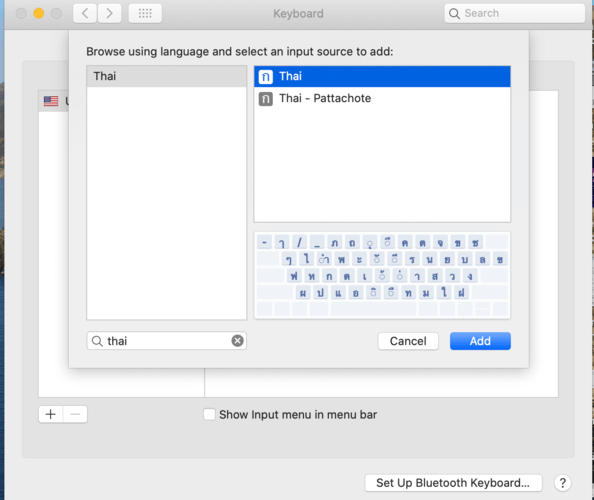
Find ‘Thai’ and then click ‘Add’. I always use the first one as shown in the screenshot.
Step 6
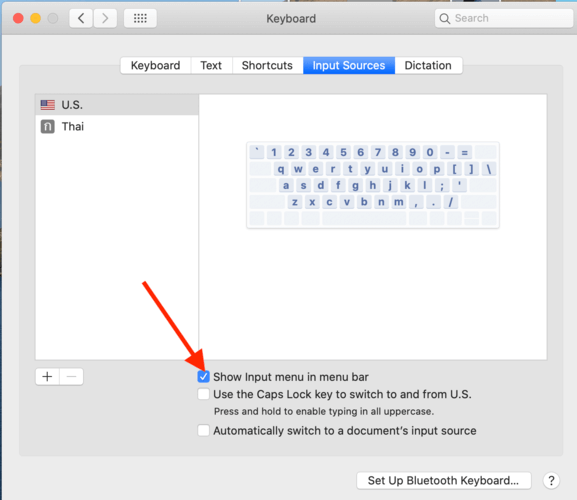
Now make sure ‘Show input menu in menu bar’ is selected. This makes it so that you can easily switch between your regular keyboard and the Thai Keyboard in your menu bar as shown in the second screenshot below.
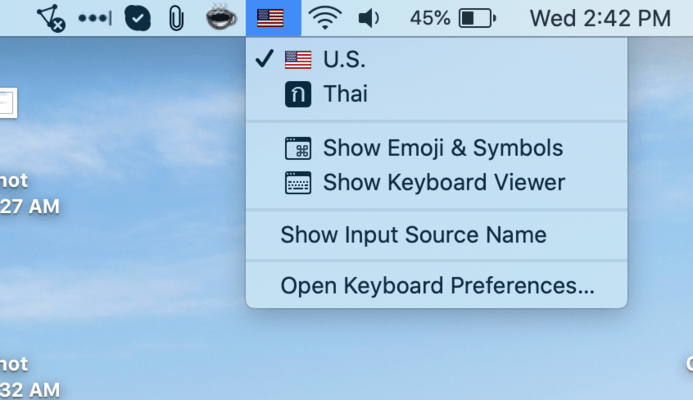
That’s it! Now you will be able to use the Thai keyboard. You can also select ‘Show Keyboard viewer’ (as shown in the screenshot above) to view where all the letters are in the Thai keyboard on your screen (screenshot below).
